'Recognizing the need is the primary condition for design.'

Charles Eames

'To design is to communicate clearly by whatever means you can control or master.'
Milton Glaser

2 X 90 degree Servo motor joystick controller

Components Required: 


2X 90 Degree servo motors

1X Analogue joystick

Arduino uno / Elegoo mega type micro controller 

Wiring Instructions:

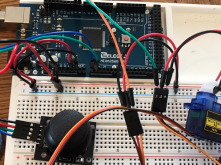
Use the instructions below with the image gallery to connect the components as follows:


5V + and - GND power from micro controller board to breadboard

1: Connect the 5V+ on the mega board to the + red rail on the breadboard, then connect the GND on the mega board to the - blue rail on the breadboard. 


Servo Motors:

2: Connect the Servo Motors as follows, Connect both motor GND and V+ wires (brown and red) to the 5V + and 0V - GND rails on the breadboard. 


Connect one servo motor control pin (orange) to pin 8 and the other servo motor control pin (orange) to pin 9 on the micro controller board. 


Analogue Joystick
3. Connect 5V+ and the GND on the joystick module to the +5V and -0V on the breadboard power rail. Then, connect the VRx pin to analogue pin A0 on the micro controller, then the VRy pin to analogue pin A1 on the micro controller. (we will leave the SW pin for now but this could be programed to trigger a function when the joysitck is pressed down) 

Add the code below with the Arduino IDE compiler to your microcontroler:
#include <Servo.h>
 
// Create servo objects
Servo servoX;
Servo servoY;
 
// Analog pin constants
const int joystickXPin = A0;
const int joystickYPin = A1;
 
// Joystick value variables
int joystickXValue;
int joystickYValue;
 
// Servo positions
int servoXPosition = 90;  // Initial position for X-axis servo
int servoYPosition = 90;  // Initial position for Y-axis servo
 
// Servo pin constants
const int servoXPin = 9;
const int servoYPin = 8;
 
void setup() {
  // Attach servo objects to their respective pins
  servoX.attach(servoXPin);
  servoY.attach(servoYPin);
}
 
void loop() {
  // Read joystick values
  joystickXValue = analogRead(joystickXPin);
  joystickYValue = analogRead(joystickYPin);
 
  // Map joystick values to servo positions (0-180)
  servoXPosition = map(joystickXValue, 0, 1023, 0, 180);
  servoYPosition = map(joystickYValue, 0, 1023, 0, 180);
 
  // Move the servos to the mapped positions
  servoX.write(servoXPosition);
  servoY.write(servoYPosition);
 
  // Add a small delay for smoother control
  delay(10);
}


Code for Joystick and 2X servo
Code for Joystick and 2X servo.rtf
Text document [57.7 KB]
Print | Sitemap
© Julian Kupper